Microsoft just released a new Azure DevOps service offering called Azure Pipleines that is free for open source projects. I decided to check it out by moving my PSGraph build and release pipeline over to Azure Pipelines.
Index
CI/CD pipeline review
The CI/CD pipeline is short for Continuous Integration / Continuous Delivery. I have an older post where I break down the CI/CD pipeline that I use for my modules:
To add context for this post, this pipeline is about allowing me as a dev to check in changes frequently. Every check-in gets tested so I get feedback quickly about issues. Then if everything is good, it gets automatically deployed to the PSGallery.
Build.ps1
My current pipeline uses AppVeyor to run a build.ps1 script and that script takes care of everything else. The main reason that I use a build.ps1 is that I feel that everyone should be able to build the project locally. This makes it easy to move to a different build system.
My task for today is to get Azure pipelines to run my build.ps1 script.
Getting started with Azure Devops
I got started by signing into the Azure Devops portal.

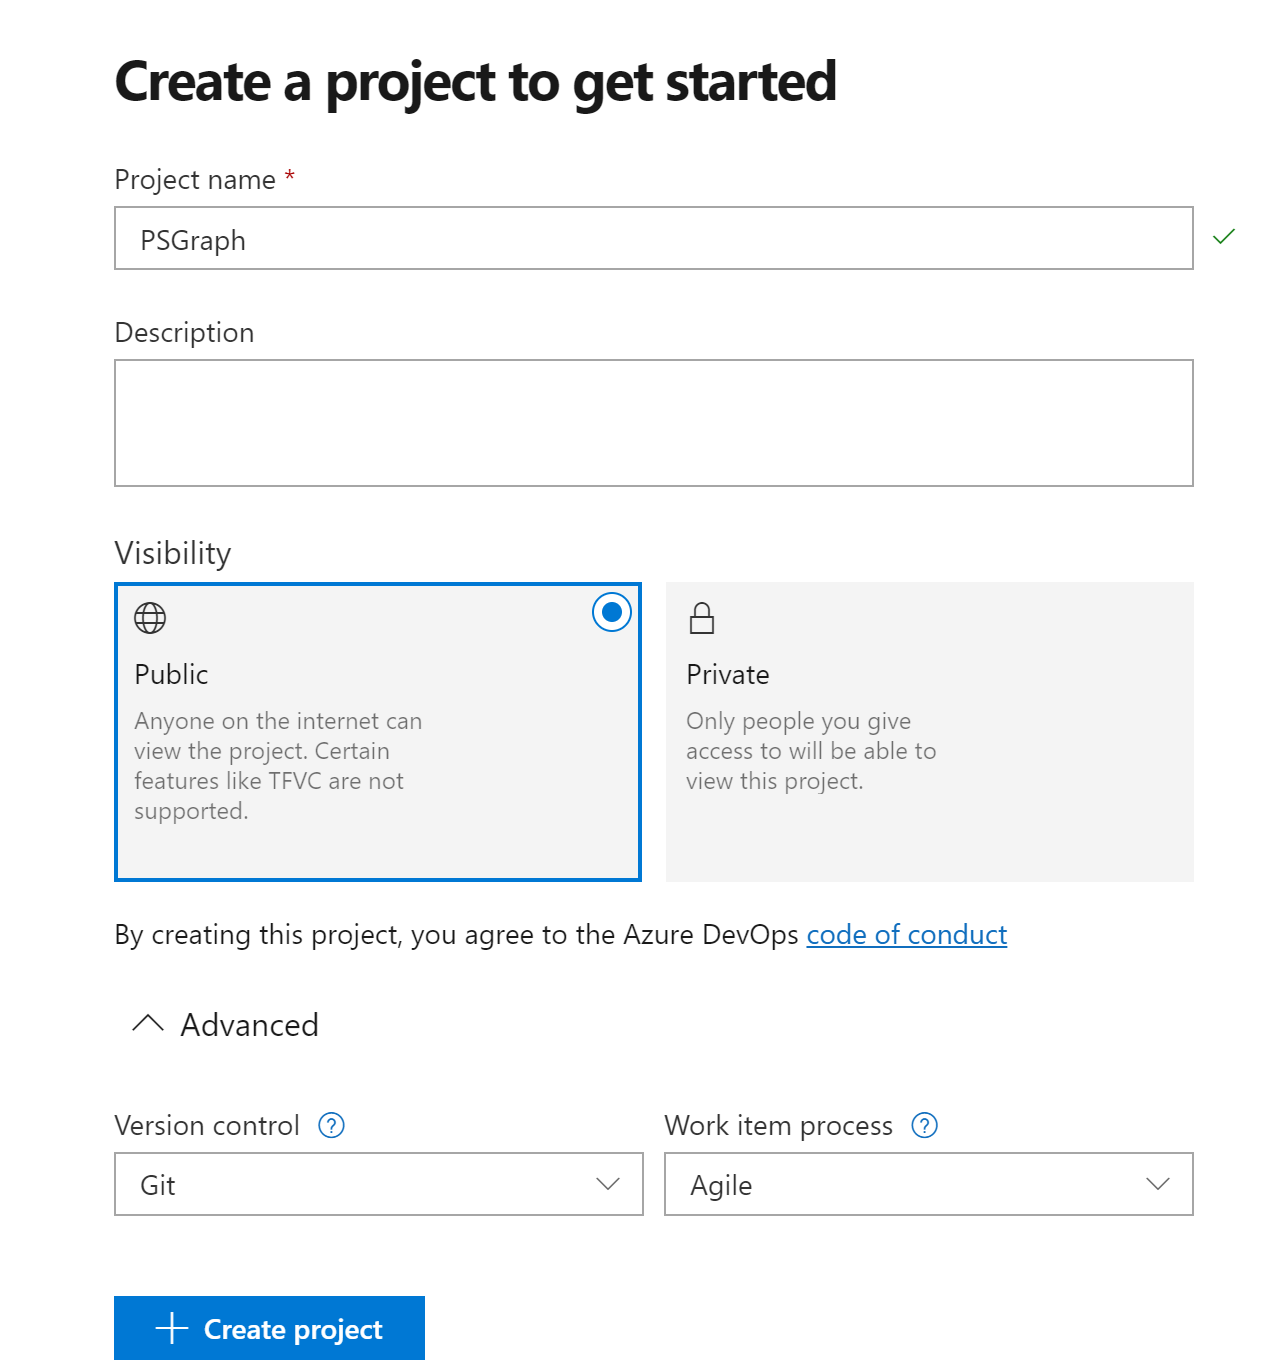
Then we create a new project. I gave it the name PSGraph to match the name of my GitHub repository for that module.

New build pipeline
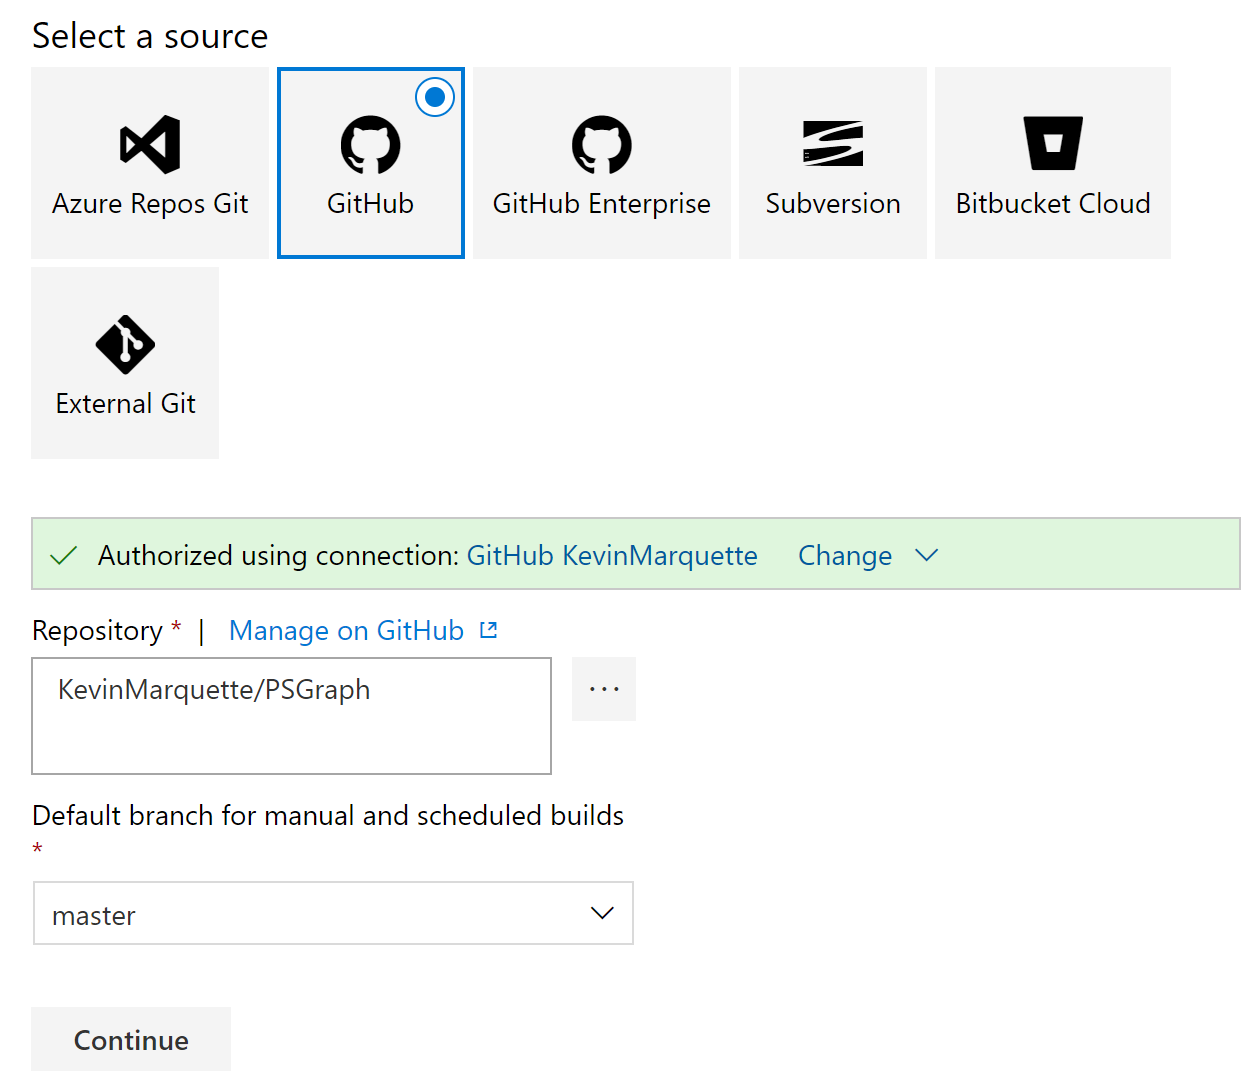
Once the empty project was created, all the screens were filled with big buttons directing me where to go. I basically ended up in the Pipelines -> Build section and created a new build. I selected GitHub and had to authenticate with my GitHub account before I could specify my project and branch.

Build steps
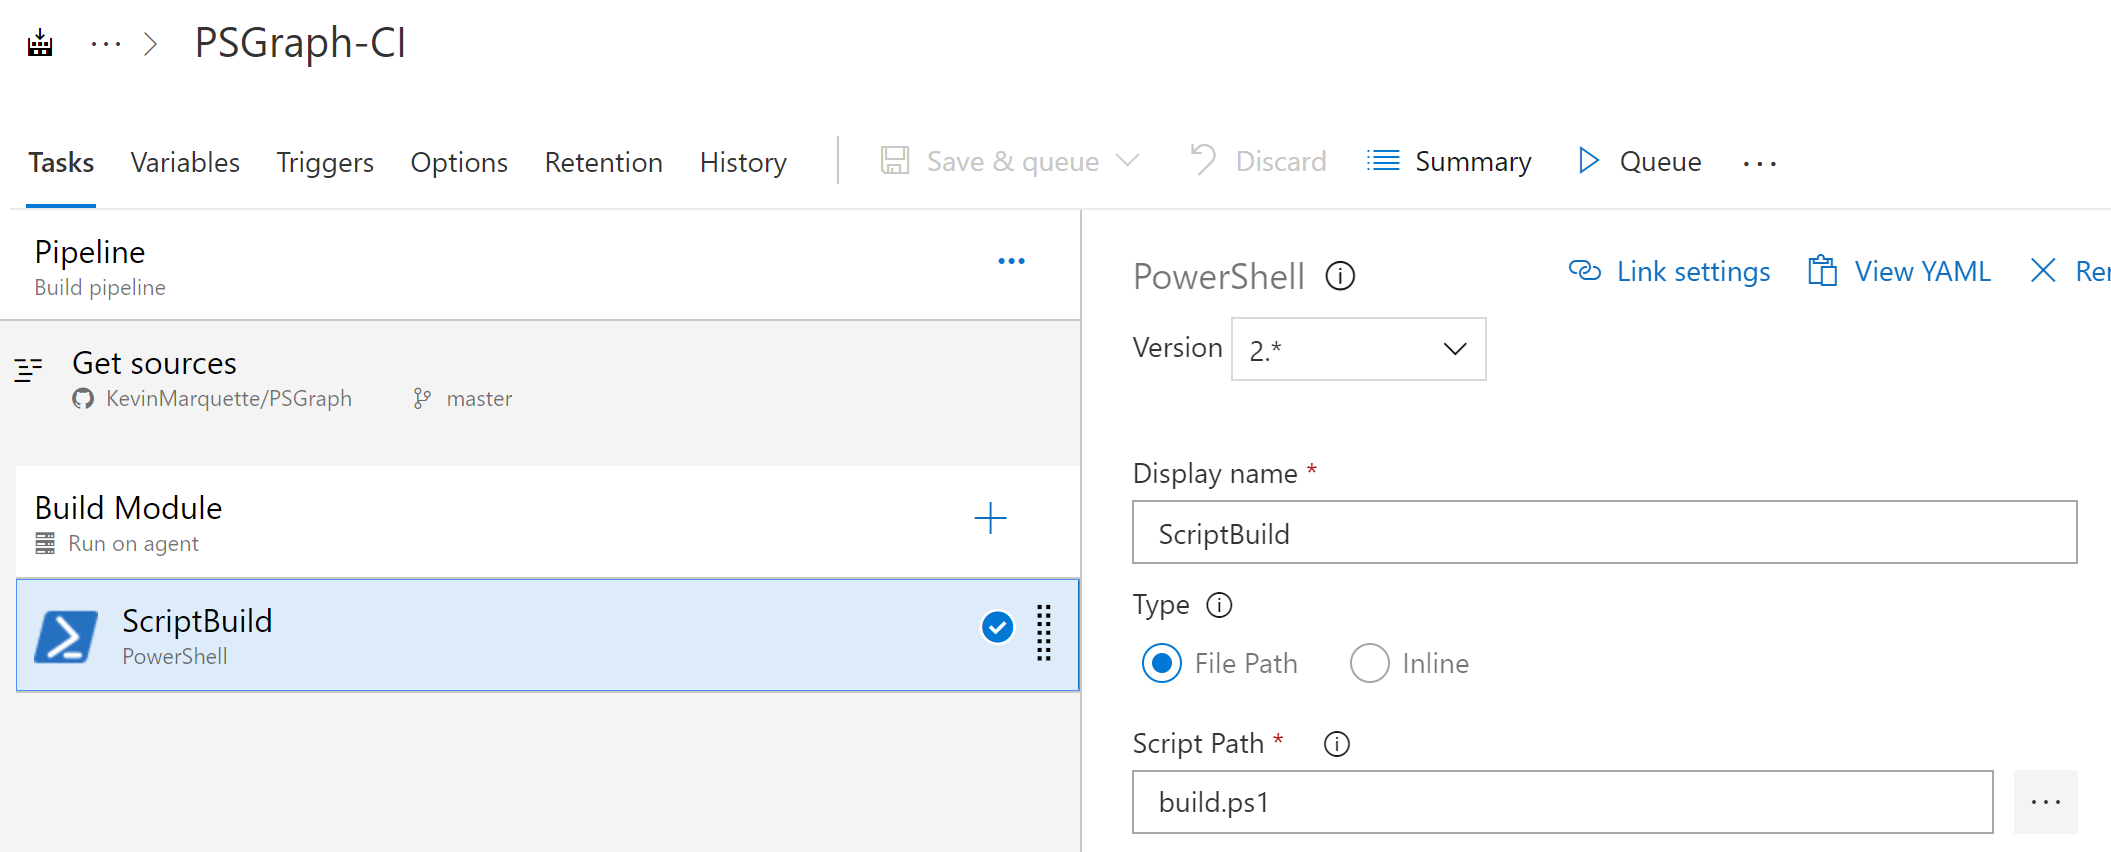
I selected an empty build template because I knew I only needed a single build step. Once I was into my build definition, I added a step to run a PowerShell script. I specified the script path as build.ps1.

Once I had that step in place, I started testing my build and it mostly worked really well.
NuGetApiKey environment variable
One important detail about my previous build was that I had an encrypted value for my NuGetApiKey that was injected by AppVeyor. My build script would read that from $ENV:NuGetApiKey when it would publish the module. So I had to find a way to recreate that in Azure Pipelines.
I started with the Variables tab on the build. I added a new one with the name NuGetApiKey, specified my API key, then clicked the little padlock icon to secure it. If you don’t remember your API Key, then you can generate a new one from the PSGallery website.

Build variables are normally also environment variables. But this is not automatic for the secured variables. So we have to map it into our script. So go back to the tasks and select the PowerShell build step that we added previously. Expand the Environment variables and add our API Key. I used the same name so it is called NuGetApiKey with a value of $(NuGetApiKey).

That syntax for the value is special to Azure Pipelines. That is how you reference build variables in properties of build steps. There is a large list of predefined variables available that you can also use.
Enable continuous integration
The last thing we need to do is enable continuous integration on our build. Go to the triggers tab and continuous integration is one of the first options available. This is the step that makes you build run every time you merge into master.

If you also want your build to run for pull request validation then you can do that on this screen too. My build.ps1 has logic built into it to detect if its on the master branch or part of a pull request so it is safe to run in both scenarios. An alternate way to do this would be to set up a 2nd build for pull requests that does not execute the publish.
Running the build
Now everything is in place. We can go back to our normal workflow of creating pull requests for changes to see them validated by the build. Then once they are merged into master, the main build will run and publish the module.
Closing thoughts
I have worked with the on-prem TFS for a while now and most of these screens and options are the same. I did everything by hand just to see all the pieces fall into place, but this setup can be automated and there is support for yaml based configs. I plan on exploring these other features as I find time.
I hope this gives you a quick jump-start on how to leverage the Azure DevOps PipeLine for some of your projects.